
by Lynn Hoyt and Pamela Zimmerman - taken at NCBA 2002
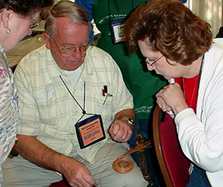
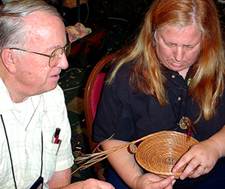
Bill Newman was teaching at the North Carolina Basketmaker's Association Convention, in Durham, NC.
It was the only coiling class offered at NCBA this year, and we had looked forward to this. With all the nut slices, it was different from most baskets we had coiled in the past. In addition, we had heard Bill Newman is an A-1 basket maker and teacher. We found he lived up to his reputation, and that his quiet manner helps students remain calm in the face of a very complex and challenging basket.
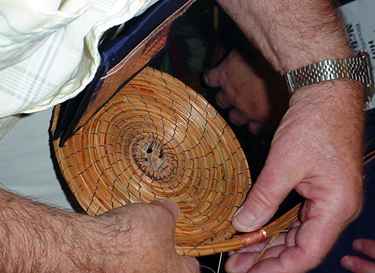
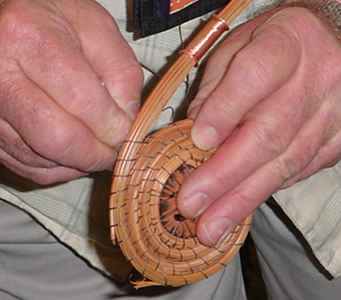
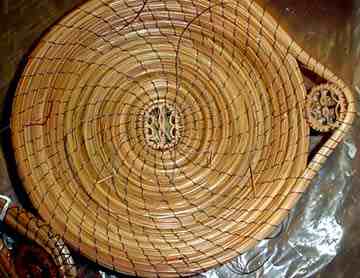
The class started with pre-made center, consisting of walnut slice and several rows of coiling. Initally this was something of a disappointment. From previous experience, we know the most time-consuming and challenging part of a basket is the start, and were looking forward to some nutslice handling tips. After completing the class, we understand that it was a wise choice to let the "start" be a later skill. Because we had two, we could use one for coiling, while the second became a "stitching model". Bill had it set up with the extra sewing needle stuck partway through the coil, in the midst of a stitch. This was a new attempt at getting the message across, confessed Bill, and he asked us, did it help? I can't say... but it was nice to have it to look at, for the newcomers, probably, and we appreciated having it to use later!
Each pupil was provided with a generous supply of lovely long needles, already capped and ready for use. Also a hand-made copper gauge, enough walnut slices to complete the basket, a bolt of nylon basketry thread, two sewing needles, and a very nice pair of scissors with a notch for capping needles, tucked neatly into a box.
Left handed? Not a problem. This instructor finds out before the class even begins. He called each one of the participants, specifically to ask this question. He made sure if you were left handed, you had starts going that way. He also said to me "If your hands will listen, you will make a beautiful basket." (I was hoping my hands were listening. I do have trouble with my ears. )
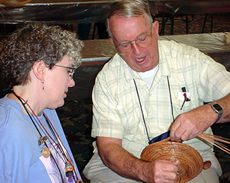
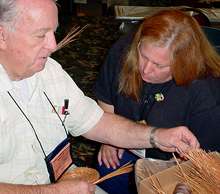
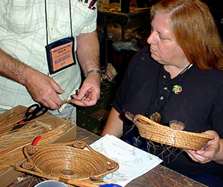
All instruction was given one on one. Each person had their own basket worked on by the instructor, and was given the attention and time required to make sure she understood what was to be done. Bill was so patient, going from person to person. It was
very interesting to learn some new techniques.
 One technique we learned was a different way
to add binder, which involved pulling a knot
through a coil several rows down. Some people required several demonstrations of his technique, but all, once mastered, were quite happy with it.
One technique we learned was a different way
to add binder, which involved pulling a knot
through a coil several rows down. Some people required several demonstrations of his technique, but all, once mastered, were quite happy with it.
He also used the pointed ends of the
pine needles when adding needles over a nut slice, for a smoother look.
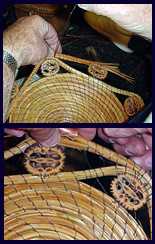
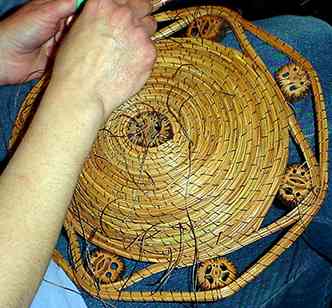
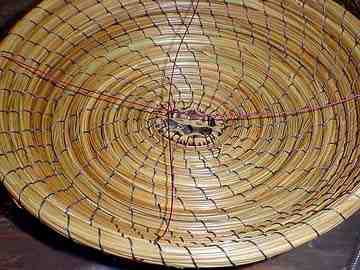
Lots of lock stitches were used around the nut slices, and these left
two inch tails which had to be cut off later.
I did not like leaving the remainder of strings hanging all over the back of my basket, as Bill asked us to do. But I decided long ago to attempt each thing while in class exactly the way the instructor demonstrated, for the duration of the class. It did not seem to hurt anything, but there was the constant worry that my active binder would hang up on something on the back of the basket, and I would not be able to tell because of all those hanging ends. But it didn't. The ends are left on so they can be firmly secured at the end of it all - by diping in shellac - as a final precaution. After the knots are dunked in shellac , they will not pull free, so the slippery nylon can safely be cut. It seems reasonable.
Bill does not turn the basket over to see where to place his stitches...his hands are sensitive enough to "feel" the previous stitch, and place his needle accordingly. Yet they are tough enough to withstand the prickling of the pine needles. I admit, I have coiled quite a bit, but had to get some basket maker's tape to cover my finger tips.
Our teacher advocated picking up very little coil with each stitch. This made each coil stand out distinctly, which I suppose added to the very traditional symetrical look of the basket. He also was quite precise in bringing up the sides at the proper location and angle... he was talking degrees here! Even though I had the impression that Bill was a perfectionist in his own work, which was beautifully executed, he understood and allowed for differences in everyone else's.
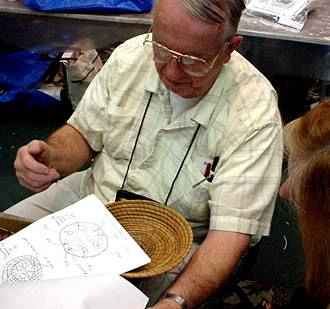 It was evident from the beginning that Bill had spent a great deal of
time and effort in teaching preparation. His 17 pages of instruction,
complete with index and price list, was precise and technical. It was a bit mind-boggling, actually, a bit like a thesis
on making this particular nut slice basket.
It was evident from the beginning that Bill had spent a great deal of
time and effort in teaching preparation. His 17 pages of instruction,
complete with index and price list, was precise and technical. It was a bit mind-boggling, actually, a bit like a thesis
on making this particular nut slice basket.
He used many hand-drawn illustrations, personally developed terminology, numbering and lettering systems to help with each step. From the drawings, you will know Bill is an engineer. He uses abbreviations for everything, and takes the application of a nutslice to a precise science. From figuring where it will be placed, to which hole is stitched here and how many times...even the "types" of slices are classified, into single rib and double rib walnut slices. Once decoded and understood, it does make the application of a nutslice easier, following his step-by-step instructions.
Bill has been making baskets for over 17 years, and has taken that time to apply engineering to basketmaking. For instance, how much binder does it take to bridge pine needles over a nutslice? He can tell you. So when I asked him a question, expecting an engineering-based answer, I was surprised at the reply, "Oh, it just looks nicer that way." He was right. The arrangement of the slices in this basket depended on their type, balance, and the visual appeal. Just because he is an engineer, we did not lose the art aspect of the whole thing!
This tireless teacher had about 8 or 10 of the basket we were making in all in different stages of
completion, displayed in progressive order on a table. So, we could
look, or take one back to our coiling for reference. That was a great
teaching aid.
This array of sample baskets... well, it was simply amazing. These baskets take hours to coil, you understand. But there they were, each step individually demonstrated. A whole BASKET for each step, I mean. This is something new, Bill says...an attempt to demonstrate how the basket grows, little by little. Taking it from the whole, overwhelmingly lovely, intricate creation, and breaking it down into steps. Quite succesfull if you ask me.
The Sample Baskets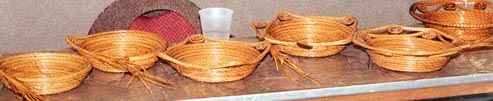 |
|
 Centering the walnut slices |
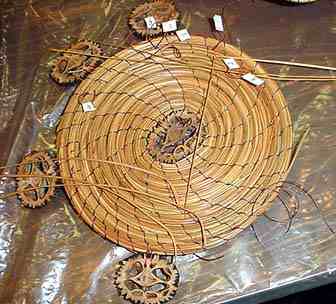 Threads marked with paper show the steps on adding a nutslice, and adding binder |
 Bridging the first nut slice |
 Adding the second nut slice |
 Adding the second row of nutslices |  Samples showing how to add binder, the completed first row of nutslices, and how to remove excess needle points from the basket |
 Bill also sells nutslices for your basket (single or double-rib!) I must admit, these had to be the most lovely nut slices I had ever seen...they were quite thick, and perfect, every one of them. No edges or end slices here! Also the most expensive, I think they were $1.50 each...but hey, you get what you pay for.
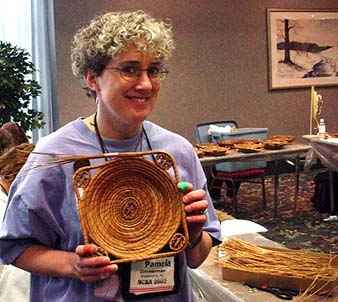 Bill thought each person would be able to finish the basket in class. Admittedly, it was a bit of a high expectation. Only Pamela finished her basket,and had plenty of time. Lynn all but finished backstitching hers...and she was way ahead of the rest of the class. The other class participants had some to no experience coiling. But this did not phase Bill. We believe the only reason his goal was not reached was class size. He certainly did everything he could to move it along.
 We thoroughly enjoyed this class. If you get a
chance to take a coiling class with Bill Newman, by all means take it.
We promise the experience will be enriching...and "if your hands will listen, you will make a nice basket", no question.
We thoroughly enjoyed this class. If you get a
chance to take a coiling class with Bill Newman, by all means take it.
We promise the experience will be enriching...and "if your hands will listen, you will make a nice basket", no question.
Bill Newman's work can be seen at The Art of Pine Needle Basketry in North Carolina.
![]() links checked by B. West 1/26/04 thanks!
links checked by B. West 1/26/04 thanks!